If you have ever sat through a presentation where the speaker frantically clicked through slides while losing their train of thought, you already understand why learning how to make PowerPoint slides automatically play matters. Automated and interactive presentations solve two completely different problems. Auto-play removes the mechanical burden of advancing slides manually. Interactivity transforms a passive audience into an engaged one. Both techniques are worth knowing, and in 2026, AI tools have made both dramatically easier to set up.
This guide covers the exact steps for enabling automatic slide advancement in PowerPoint, the methods for making your presentations genuinely interactive, and how modern AI presentation tools handle both automatically.
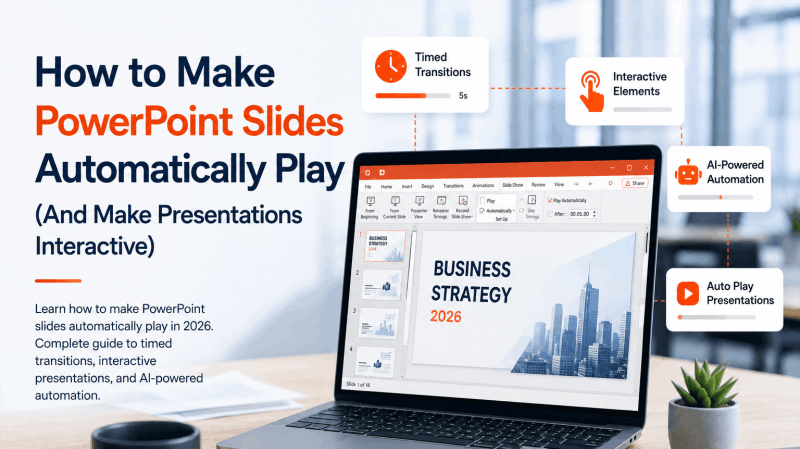
How to Make PowerPoint Slides Automatically Play
PowerPoint offers two primary approaches to automatic slide advancement: setting timed transitions on individual slides, and using the Rehearse Timings feature to record a live run-through. Both achieve the same end result. Which one you use depends on whether you want a fixed, uniform timing or a custom timing that reflects how long you actually spend on each slide.
Method 1: Set Automatic Slide Timings Manually
This method lets you specify exactly how many seconds each slide displays before advancing to the next one. It is the fastest approach when you already know your pacing.
Step 1: Open your PowerPoint presentation and click on the Transitions tab in the ribbon.
Step 2: In the Timing group on the right side of the ribbon, you will see two checkboxes under “Advance Slide.”
Step 3: Uncheck On Mouse Click if you want the presentation to advance without any manual input.
Step 4: Check After and enter the number of seconds you want each slide to display. For example, entering “5:00” will hold each slide for five seconds before advancing.
Step 5: Click Apply to All to apply this timing to every slide in the deck at once. If different slides need different timing, set each slide individually by selecting it first before clicking Apply.
Step 6: Press F5 to run the presentation from the beginning. Slides will now advance automatically at your specified interval without any manual clicking.
Step 7: To confirm the auto-play is working correctly, go to Slide Show in the ribbon and click Set Up Slide Show. Under “Advance slides,” make sure Using timings, if present is selected rather than “Manually.”
Method 2: Use Rehearse Timings for Natural Pacing
Rehearse Timings records how long you actually spend talking through each slide during a practice run. This produces more natural timing than a fixed interval, especially for presentations where some slides require more explanation than others.
Step 1: Click the Slide Show tab in the ribbon.
Step 2: Click Rehearse Timings in the Set Up group. The presentation will enter full-screen mode and a small recording toolbar will appear in the top-left corner showing the time elapsed on the current slide and the total presentation time.
Step 3: Deliver your presentation as you would in front of a real audience. Advance each slide when you would naturally move on. The timer records how long you spend on each slide.
Step 4: When you reach the end, PowerPoint will show you the total recorded time and ask if you want to keep the slide timings. Click Yes to save them.
Step 5: Your recorded timings now appear beneath each slide thumbnail in Normal view. Run the presentation with F5 and it will advance automatically using your rehearsed pacing.
Tip: If a particular slide timing needs adjustment after rehearsal, select that slide in the Transitions tab and manually update the After value in the Timing group. You do not need to re-record the entire rehearsal for a single correction.
Method 3: Loop a Presentation Continuously
For kiosk displays, trade show booths, lobby screens, or any unattended auto-running presentation, you will want the deck to loop back to the beginning after the final slide.
Step 1: Go to Slide Show and click Set Up Slide Show.
Step 2: Under “Show type,” select Browsed at a kiosk (full screen). This setting automatically enables looping and disables manual mouse-click advancement.
Step 3: Confirm that Using timings, if present is selected under “Advance slides.”
Step 4: Click OK. Your presentation will now run automatically and restart from the beginning each time it reaches the final slide.
How to Make PowerPoints Interactive
Knowing how to make PowerPoints interactive requires a different mindset than setting up auto-play. Automatic presentations reduce the presenter’s workload. Interactive presentations shift control partly to the audience. The goal is engagement: giving viewers something to respond to, click on, or navigate themselves.
Add Clickable Navigation with Hyperlinks
Hyperlinks turn any text, shape, or image into a navigation button that jumps to a specific slide, opens a website, or triggers a document.
Step 1: Select the text or object you want to make clickable.
Step 2: Right-click and select Hyperlink, or press Ctrl + K (Windows) or Cmd + K (Mac).
Step 3: In the dialog box, choose Place in This Document to link to another slide within the same presentation. Select the target slide from the list.
Step 4: For external links, choose Existing File or Web Page and paste the URL.
This technique is particularly useful for building menu-style presentations where the audience can navigate to different sections non-linearly.
Use Action Buttons for Built-In Navigation Controls
PowerPoint includes a set of pre-designed action buttons that create consistent navigation controls across your deck.
Step 1: Go to Insert and click Shapes. Scroll to the bottom of the shapes panel to find the Action Buttons section.
Step 2: Draw an action button on your slide. The Action Settings dialog will open automatically.
Step 3: Assign the button to navigate to the next slide, the previous slide, the first slide, the last slide, or a specific named slide. You can also assign sounds to play when the button is clicked.
Step 4: Copy the button and paste it across all slides where you want consistent navigation controls.
Embed Polls and Live Q&A with Third-Party Tools
For truly interactive audience participation, embedded polling tools transform a static presentation into a live conversation. Several platforms integrate directly with PowerPoint.
Mentimeter allows you to embed real-time polls, word clouds, and Q&A sessions inside a PowerPoint presentation. Audience members respond on their phones and results appear live on the slide.
Slido offers a similar feature set with stronger enterprise integrations. It supports live polls, quizzes, and moderated Q&A sessions that update in real time as the audience participates.
Poll Everywhere is a long-standing option with a wide range of question formats including multiple choice, open-ended responses, and ranked voting.
These tools require audience members to have a device with internet access, which is a standard assumption for most professional and educational settings in 2026.
Add Triggered Animations for Visual Interactivity
Animations triggered by clicks rather than auto-playing on slide entry give presenters precise control over what the audience sees and when.
Step 1: Select the object you want to animate.
Step 2: Go to the Animations tab and choose an animation effect.
Step 3: In the Timing group, set the Start option to On Click.
Step 4: Open the Animation Pane to manage the sequence of triggered animations on each slide. You can reorder them, adjust timing, and preview the sequence.
This approach works especially well for progressive reveals: building a complex diagram one element at a time, or revealing data points one by one to control narrative pacing.
Interactive Presentation Tools Beyond PowerPoint
PowerPoint handles auto-play and interactivity competently, but several dedicated interactive presentation tools go further, particularly for audience engagement and real-time collaboration.
Mentimeter is purpose-built for interactive presentations. Every slide type is designed around audience participation: polls, quizzes, scales, open-ended responses, and word clouds. The presenter controls the flow while the audience shapes the content.
Prezi uses a spatial, non-linear canvas rather than a slide-by-slide structure. Presenters can zoom in and out of content areas, which creates a dynamic visual flow that linear slide decks cannot replicate.
Genially specializes in interactive content creation, including presentations, infographics, and escape rooms. Its interactivity layer supports hover effects, click-to-reveal content, embedded video, and branching navigation paths.
Nearpod is widely used in education, combining presentation delivery with embedded quizzes, collaborative boards, and virtual reality experiences that students access on their own devices.
For most professional contexts, the combination of PowerPoint’s native auto-play features and a polling tool like Mentimeter or Slido covers the full range of interactivity needs without requiring a platform switch.
How AI Presentation Tools Handle Auto-Play and Interactivity
Setting up timed transitions and interactive navigation elements manually takes time, especially across a large deck. AI presentation tools in 2026 handle both automatically as part of the generation workflow.
Presenti AI generates complete slide decks from text prompts, uploaded documents, and Markdown files. The generated PPTX files are fully compatible with PowerPoint’s transition and animation settings, meaning you can apply auto-play timing to an AI-generated deck in the same steps described above. Because the slides are exported as native .pptx files, every PowerPoint feature works on the output exactly as it would on a manually built deck.
The advantage of starting with AI-generated slides is that the structural and design work is already done before you add interactivity. Instead of spending two hours building the deck and then another 30 minutes adding transitions and navigation, you spend five minutes generating the deck with AI and then apply your timing and interactivity settings to finished, professional slides.
For presentations that need to be built quickly and set to auto-play for an unattended display or a self-running demo, this workflow cuts total preparation time from several hours to under 30 minutes.
Choosing the Right Approach for Your Presentation
Not every presentation benefits from the same level of automation and interactivity. A few guiding questions help clarify the right setup.
| Scenario | Recommended Approach |
|---|---|
| Keynote or conference talk | Rehearse Timings for natural auto-advance |
| Unattended kiosk or lobby display | Fixed timing with continuous loop |
| Client pitch with live Q&A | Manual advance with embedded Slido or Mentimeter |
| Self-paced training module | Hyperlink navigation with action buttons |
| Classroom lesson | Interactive tool like Nearpod or Mentimeter |
| Product demo video | Record with narration and export as video |
| Quick business update | Fixed 20-second timing per slide |
The most engaging presentations in 2026 combine structural clarity with selective interactivity. Auto-play handles the mechanics. Polls, embedded questions, and clickable navigation layers give the audience a role. AI tools handle the slide creation. Each element serves a distinct purpose.
Make Your Next Presentation Run Itself
Learning how to make PowerPoint slides automatically play and how to make Powerpoints interactive gives you two tools that solve different problems. Auto-play removes the friction of manual advancement and makes unattended presentations possible. Interactivity transforms passive viewers into active participants and makes presentations more memorable.
The steps are straightforward. Set your transition timing in the Transitions tab, use Rehearse Timings for presentations that need natural pacing, enable kiosk mode for looping displays, and add hyperlinks or polling integrations where audience participation matters.
For the fastest path from idea to polished, auto-ready presentation, Presenti AI generates professional slide decks in minutes that are ready for PowerPoint’s full range of timing and interactivity features the moment you export them.
Try Presenti AI free today and generate a complete, professionally designed deck in minutes. No credit card required, no watermarks, and no manual formatting to fight through.